Summer is finally here, abundant and alive—yet so fleeting.
Its magic lies in its impermanence, how it urges us to savor each sun-soaked day.
Summer joy for me means gardening and weekend trips to the farmers market. By midsummer my herb garden is overflowing with parsley, basil, chamomile, lavender, mint, and more. A mix of herbs and flowers makes a magical summertime bouquet that you can enjoy fresh for a few days and then hang up to dry. I harvest herb bunches, tie them into bundles, and hang them up to dry too.
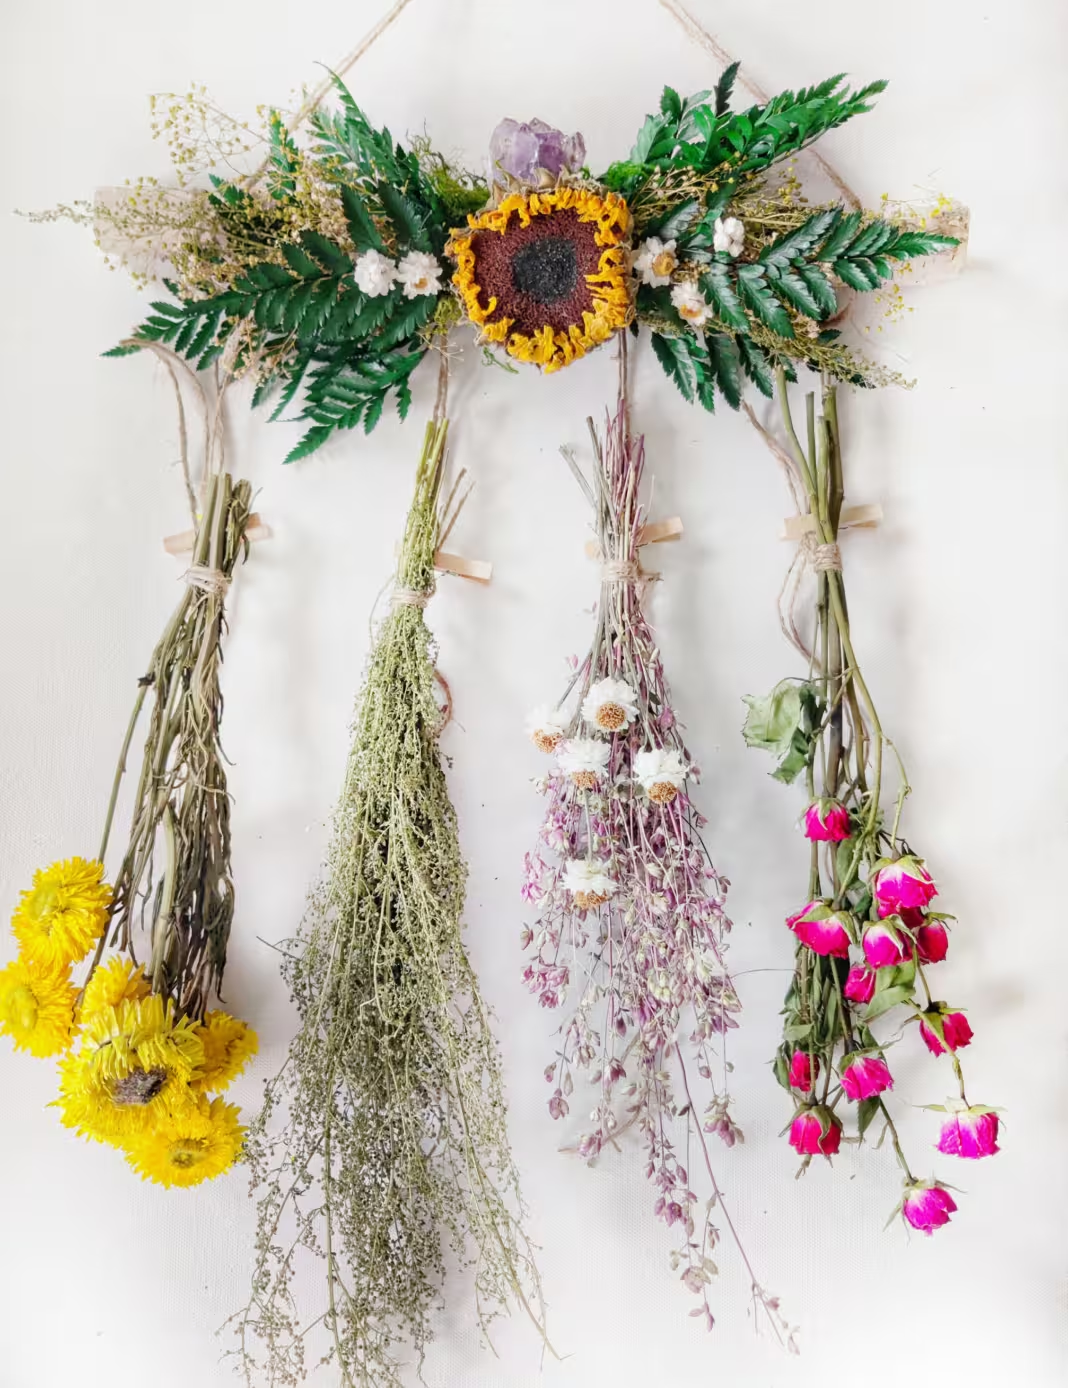
If you want to dry your own flowers and herbs, you’ll need something to hang them on. An herb and flower drying rack can be anything as simple as a peg in the wall, but if you’re like me, simple isn’t always enough. I want to make everything extra pretty and extra magical, and if it attracts a fairy or two, so be it! Whether you gather from your own garden or choose to harvest from the farmers market, this tutorial will show you how to create a gorgeous herb and flower drying rack to dry—and show off—all your most shimmering garden delights!
MATERIALS NEEDED:
• One 12- to 15-inch stick, 1 to 2 inches in diameter
• Dried and preserved moss
• 6 to 8 stems of dried and preserved ferns, caspia, baby’s breath, or other greenery of your choice
• Dried flower heads
• A crystal of your choosing, measuring from 1 to 3 inches
• 1 package or roll of natural twine
• Hot-glue gun and glue sticks
• 4 wooden clothespins
• Scissors
INSTRUCTIONS:
Step 1: With scissors, cut 4 separate lengths of twine measuring about 36 inches each.
Step 2: Loop one length of twine around the stick, using what is called the lark’s head knot: Fold the twine over itself to form a loop. Pass the loop behind your stick. Take both ends of the twine and pass them through the loop. Tighten around the stick.
Step 3: Repeat step 2 with the remaining lengths of twine. Position the lengths of twine an equal distance apart along the stick.
Step 4: Make a bouquet of greenery, filler, and herbs approximately 8 inches long. Layering different kinds of greenery and filler will give it a full, natural look. Tie the stems together with cording. With scissors or floral shears, trim the stems so that an inch is visible.

Step 5: Arrange the bouquets with stems in the center of the stick and overlapping. Both sides of the stick will now be covered with greenery.
Step 6: Cut 10 inches of twine and wrap twice around the center of the stick and stems. Secure them in place by tying a tight knot with the twine, then trim the excess twine.
Step 7: Hot-glue a cluster of moss in the center to conceal the knot.
Step 8: Add a generous amount of hot glue to the bottom of your crystal (here I used an amethyst cluster) and press down in the center of the moss, holding in place until it feels secure.
Step 9: Hot-glue flowers around the crystal however you like. You can add as little or as much as you want.
Step 10: Make the hanger for your drying rack. First, cut two separate lengths of twine, each measuring 28 inches.
Step 11: Using the lark’s head knot described in Step 2, loop each length of twine to one end of the stick.
Step 12: Bring the ends of the twine together, then tie them. Pull tightly to secure the knot.
Step 13: Clip a clothespin to each length of twine hanging down. These will allow you to quickly and easily hang bundles of flowers and herbs to dry.
Now go forth and gather your own favorite herbs and flowers to hang for this beautiful, fragrant—and practical—home decoration!






 Enchanted Living is a quarterly print magazine that celebrates all things enchanted.
