Witch windows are often found on the second story of farmhouses built in the 1800s. They’re an interesting piece of architecture born from the folk belief that witches cannot fly on their broomsticks through a crooked window. They’re also known as coffin windows, as many believe they were added to farmhouses to make it easier to remove coffins from second-story bedrooms.
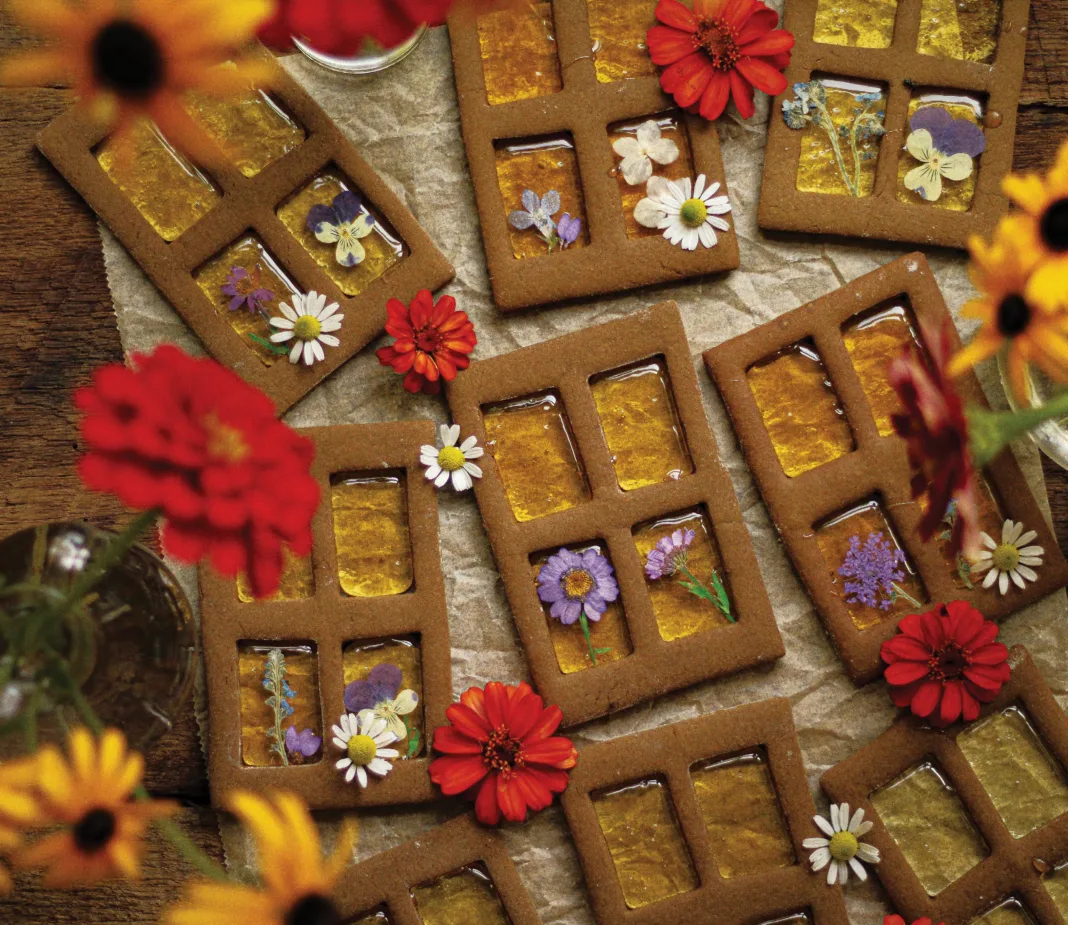
Both theories seem rather far-fetched, but they sparked something of a golden light in me. What did I think of when I heard the phrase “witch window”? I thought of an amber glow from the hearth. I thought of flowers and herbs hanging to dry and a beautiful garden reflected in the wavy glass panes. I thought of the smell of gingerbread coming from inside. For me, that is a true witch window, and what better way to share it than with a gingerbread cookie like the one here?

Witch Window
Gingerbread Cookies
Ingredients
½ cup unsalted butter (1 stick) at room temperature
⅔ cup dark brown sugar
3⅓ cups all-purpose flour, plus more for dusting
1 tablespoon ground ginger
1 tablespoon ground cinnamon
½ teaspoon baking soda
⅛ teaspoon baking powder
⅛ teaspoon salt
1 egg, at room temperature
½ cup molasses
Add the flour, ginger, cinnamon, baking soda, baking powder, and salt to a large mixing bowl. Sift to combine. Set aside.
Cream together the butter and the sugar with your electric mixer until just combined. Scrape down the sides. Add the egg and molasses and stir on low until well blended. Add in the flour slowly. (I like to use a large spoon and add a spoonful at a time until there’s no flour left.) Stop periodically to scrape the side of the bowl to make sure everything is incorporating evenly. The dough should be dry but not crumbly. Pull dough out of the mixer and divide into thirds. Wrap each third in plastic wrap and refrigerate overnight.
When ready to bake:
Preheat the oven to 350°F.
Lightly dust your work surface, rolling pin, and cookie cutters with flour. To make the windows you’ll need one large rectangle cookie cutter for the window and one smaller rectangle for the panes. Place the chilled dough on top of the floured surface. Roll side to side and up and down to make a rough square shape. You’ll want to roll the dough to an even quarter-inch thick. Use your big rectangular cutter to make as many cookies as you can fit. Place the excess dough to the side.
Use the small rectangular cutter to cut out four window panes. Save the excess with the first leftover dough. Carefully slide a floured spatula under each window and transfer it to a parchment-lined cookie sheet. Don’t be afraid to add more flour if anything is stuck. Roll out and repeat the process with the remaining dough.
Place cookies in the fridge to chill for 15 minutes before baking. Bake for 8 to 10 minutes or until just set. Allow the cookies to cool on a fresh sheet of parchment. While the cookies cool you can begin working on the candy for the windows.
Candy Ingredients
2 cups granulated sugar
⅔ cup light corn syrup
¾ cup water
1 candy thermometer
In a heavy-bottomed saucepan, mix together sugar, corn syrup, and water until dissolved, then bring the mixture to a boil.
Place your candy thermometer on the side of the pan, making sure it doesn’t touch the bottom. Continue to allow candy to boil until it reaches 260°F. This is when you’ll need to add food coloring if you want your windows to have more flair. Do not stir. Allow the mixture to continue boiling until it reaches 300°F. Remove from heat and carefully spoon candy into each window pane. Allow the candy and cookies to cool for 30 minutes before moving. Enjoy!













 Enchanted Living is a quarterly print magazine that celebrates all things enchanted.


