Photography by Marita Tathariel
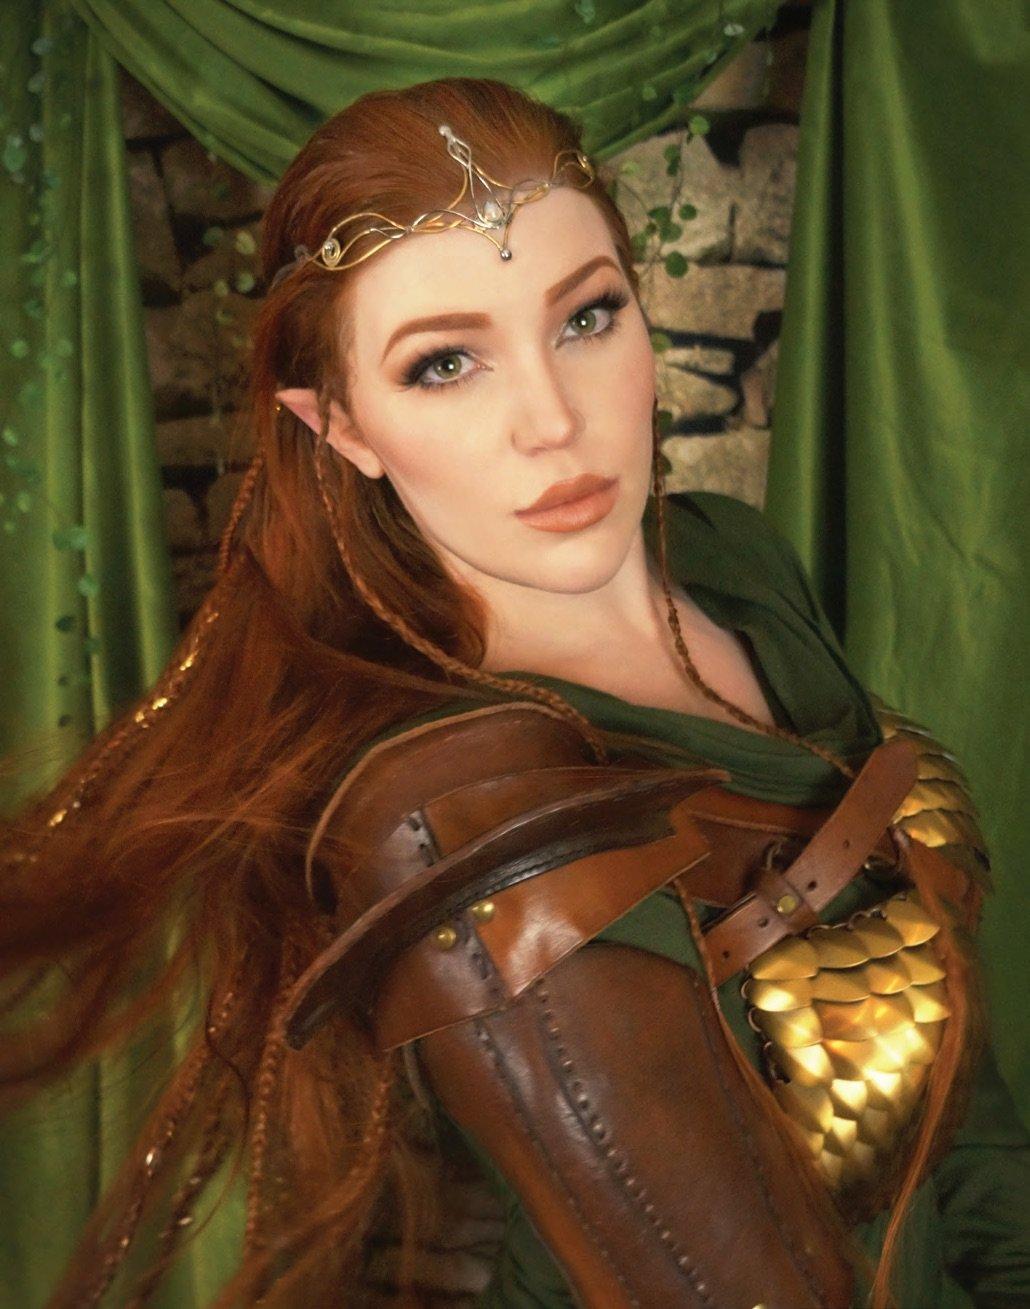
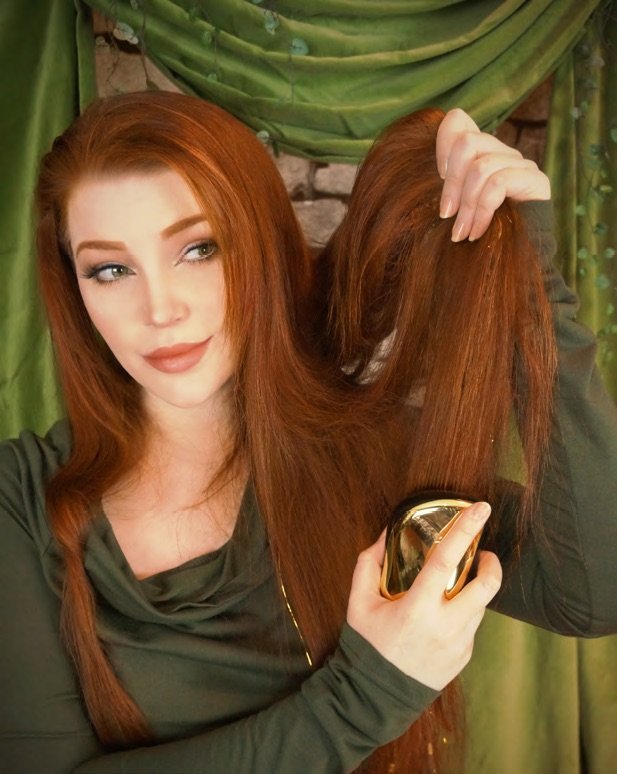
The elves are known for having beautiful, long hair, often with intricate braids. Follow along as I teach you how to create your own elven hairdo, step by step. At the end, you’ll look as if you stepped out of Rivendell’s finest hair salon! This hairdo is easiest to create with straight hair, and of course it’s even easier if your hair is tangle-free. (Trust me, it will make everything much easier!) So let’s start by detangling and brushing out our luscious locks. Once that’s taken care of, onward to the main quest!
Step 1
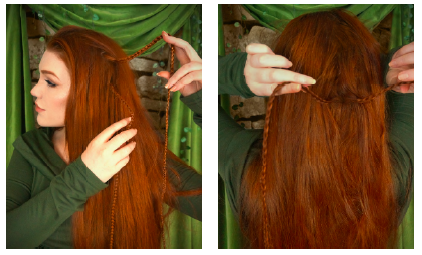
Braid six small three-strand braids.
✦ Two on each side, right above your (soon-to-be) pointy ears. Two higher up on the sides of your head, and the last two right next to each other, centered on the back of your head.
Step 2
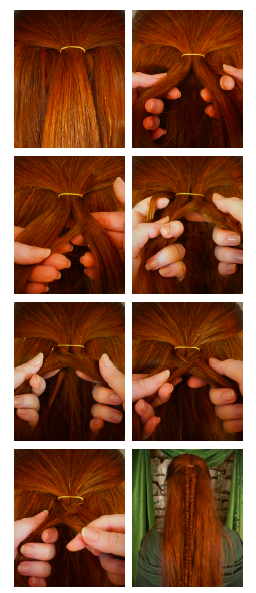
Do a fishtail braid.
Pull your hair back into a half ponytail at the back of your head. Use an elastic band to hold it in place (one that you can cut of with scissors at the end of your elven hairstyling journey).
✦ Divide the ponytail into two equal sections.
✦ Separate a small piece of hair from the outside of the right section.
✦ Pull this piece over the top of your right section, and bring it to the inside of the opposite section.
✦ Next, separate a small piece of hair from the outside of the left section. (The tinier the piece is, the more intricate your braid will appear.)
✦ Pull this piece over the top of your left section, and bring it to the inside of the opposite section.
✦ Keep moving small pieces from each side into the inside of each section.
✦ Repeat these steps until you reach the end and finish by tying the hair with an elastic band. Although I do appreciate a roughed elven warrior look, try to make this braid look tidy and even. If your hair isn’t behaving nicely, slightly mist it with a wee bit of water for better friction, and remember to pull tight as you go. Once you’re done, you can tug the sides of the braid to even it out.
Step 3
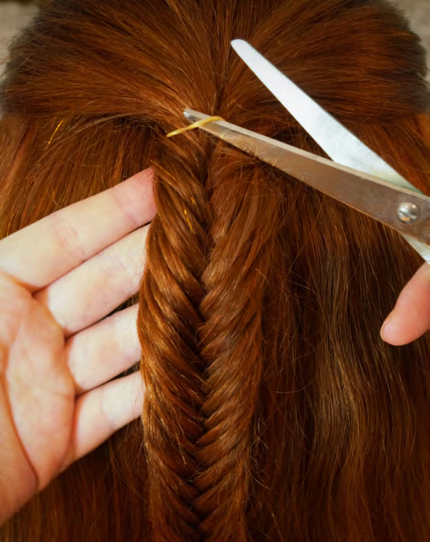 Cut off the upper rubber band.
✦ Use a scissor, and be very careful not to cut any of your hair off!
Step 4
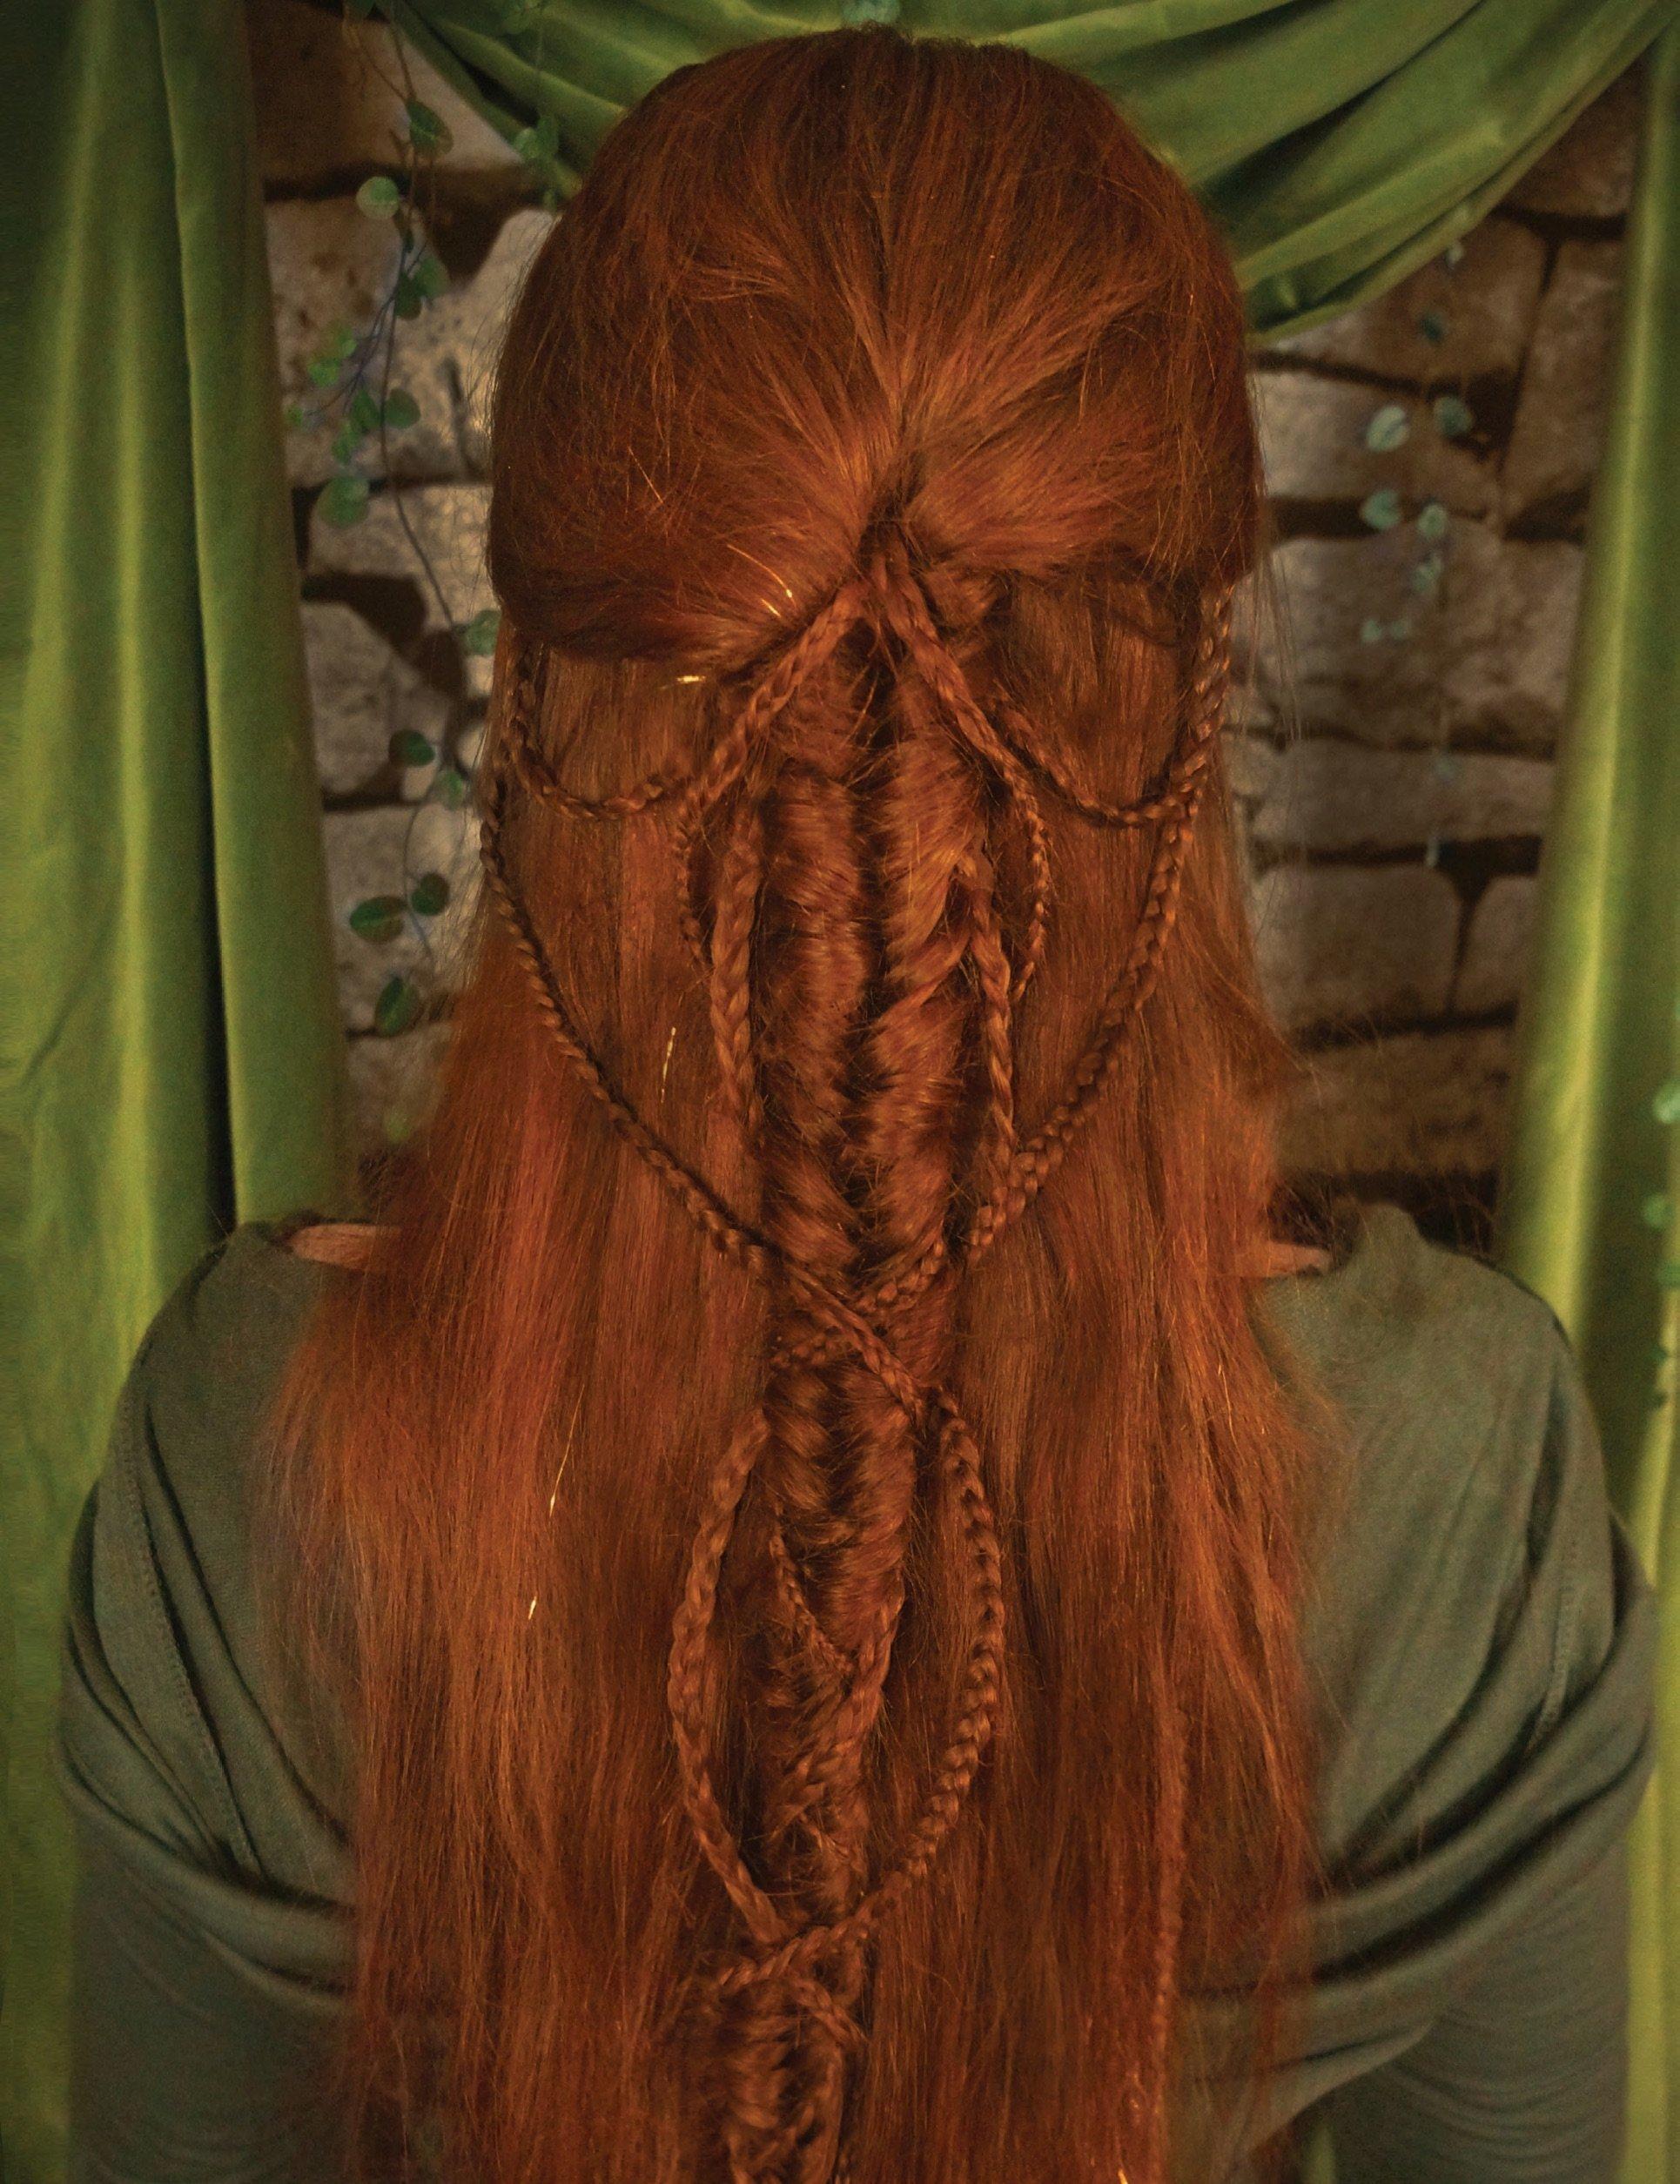
Arrange the six small braids.
(This is the fun part where the magic happens!)
✦ Grab the two braids located on the sides of your head. Pull them back and loop them around the main two sections of the fishtail braid.
✦ Overlap the two small braids on the backside of the fishtail braid, fasten with a bobby pin, and crisscross them all the way down. Finish by tying the hair with an elastic band.

✦ Next, grab the two braids located above your ear tips. Pull them back and attach them about halfway down on the backside of the fishtail braid with bobby pins. Bring the same two braids out again, and attach the ends of them as far down as possible on the fishtail braid, making sure they create wee loops on the sides.
✦ Grab the two braids located on the very back of your head—they should be hiding behind your fishtail braid. Pull them through the big loop that the second pair of braids made and attach them with a bobby pin a bit further down and behind the fishtail braid.
✦ You can be creative with this part! Twist, loop, and arrange your mini-braids however you like. Just try to make the design symmetrical.
Step 5
Braid two small three-strand braids in front of your ears.
✦ Almost done! Finish off your elven hairstyle with a pair of iconic braids in front of your ears. Feel free to decorate your braids with beads, tinsel, or anything your immortal heart desires. Let’s use that imagination and have fun. Now that your hair is as glorious as can be, put on your favorite elven ear prosthetics, Middle-earth inspired garments, and (just in case of orcs) some nifty armor!
“Hannon le” for following along.
I hope you have fun!
Follow Marita Tathariel on Instagram @tathariel.


