Broom Spell
“Sweep, sweep, sweep the ground,
All negativity shall be bound.
I banish all that is profane,
Only positivity shall remain.”
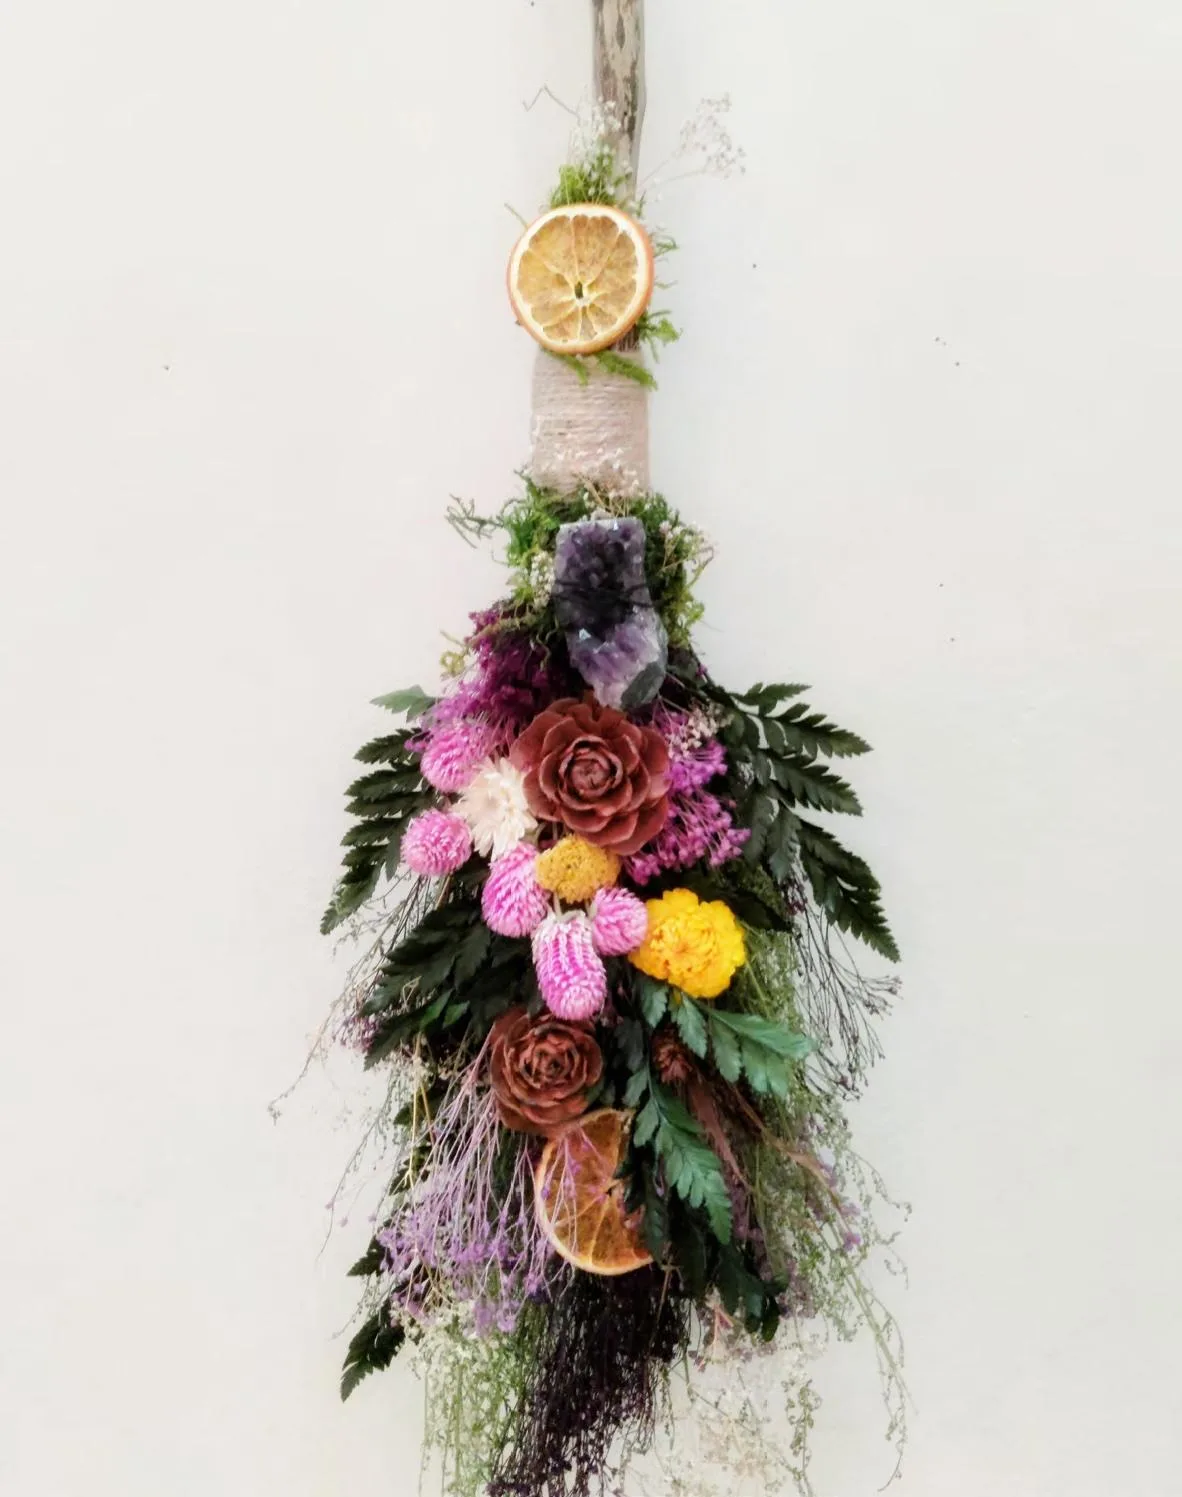
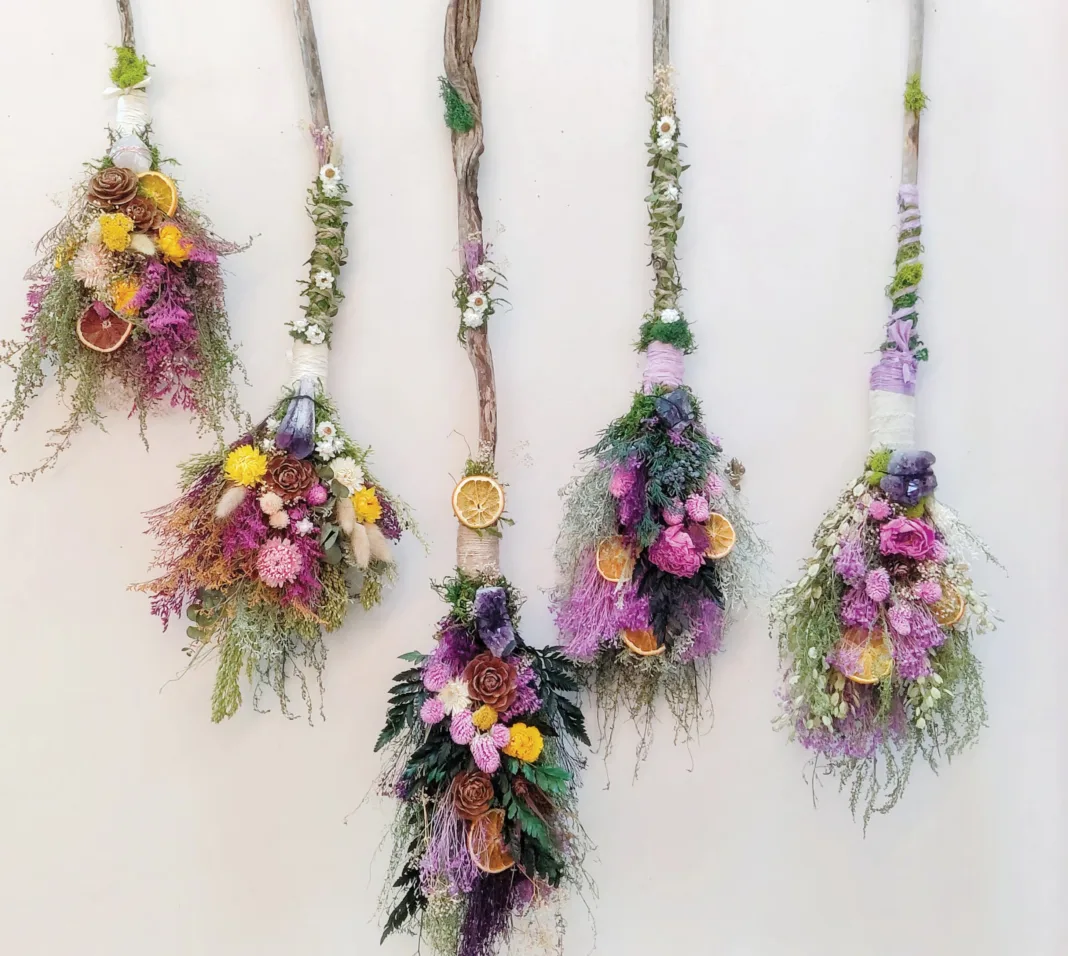
One of my absolute favorite things to create is a floral besom. I’ve been making them for years, and every single one is unique. I never know how one will look until it’s done. Each is more magical than the last. They’re perfect for practicing witches, but they also blend in as pretty home decor for those still in the “broom closet.”
To create these besoms, I combine different dried flowers, herbs, crystals, and charms. I use foraged sticks for the handles and decorate them with ribbons, twine, dried fruits, pinecones, flowers, and any other natural element that has personal meaning. Every flower, herb, and component has its own special correspondence, and combining them with the symbolism of the witch’s besom leads to a magical piece of art that is personal, intentional, creative, and meaningful.
It’s easy to make a besom of your own, as I show in this tutorial. It doesn’t take much in the way of materials or special skills—if you can make a bouquet of flowers, you’re already halfway there! Finding the perfect stick for your handle is one of the best parts of the experience: Take a walk through the woods, explore your local park, or just look around your backyard to find a truly unique stick that calls to you. After all, every witch needs a broom. Why not make yours personal and meaningful, full of lovely things that speak to you and you alone?
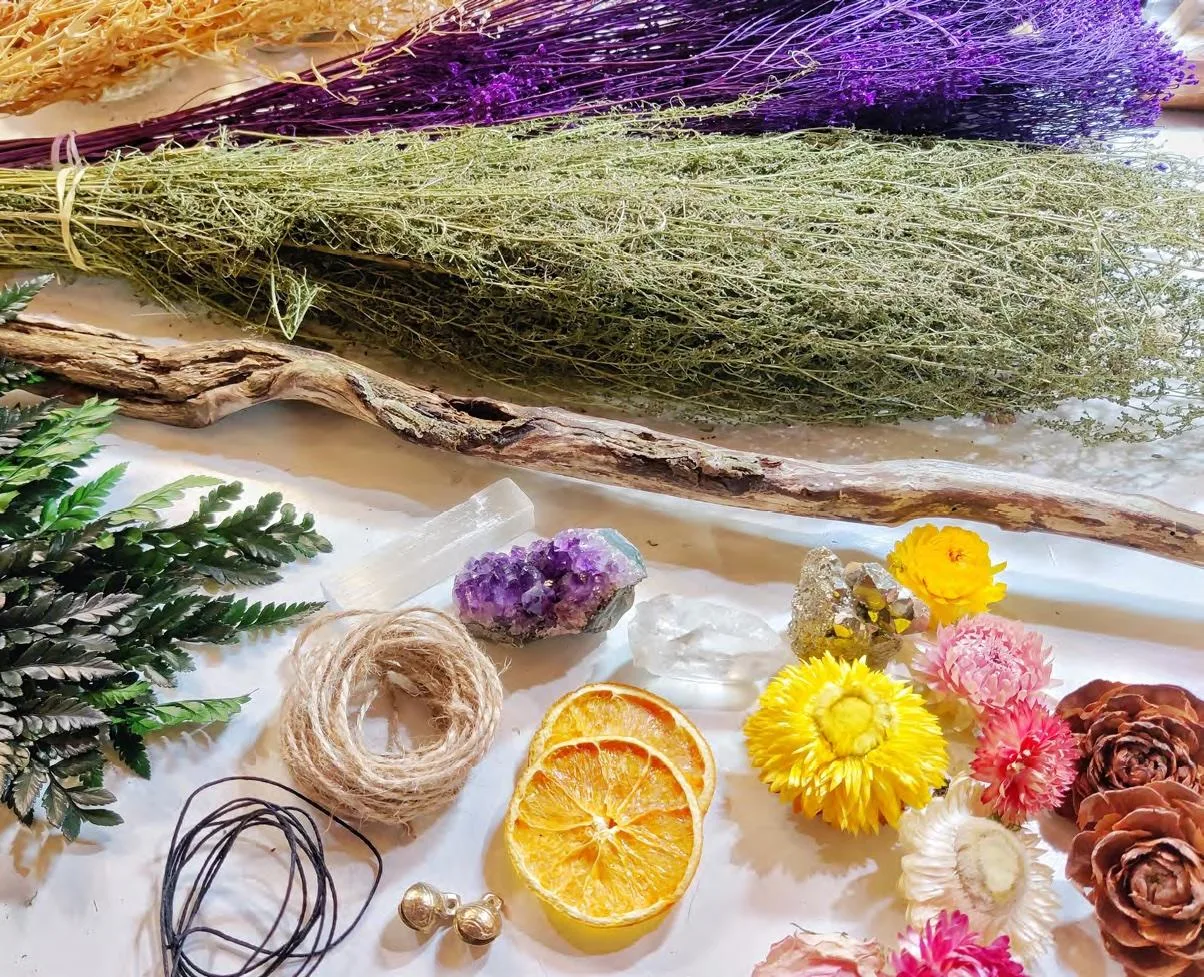
MATERIALS NEEDED:
• A stick suitable for a broom handle, found or foraged, 1 inch to 1½ inches in diameter and at least 15 inches long
• 1 or 2 bunches dried or faux filler, such as baby’s breath, caspia, or broom bloom
• 5 to 8 stems, dried or faux flowers
• Accents, such as crystals, single flowers, pinecones, bells, charms, etc.
• 5 feet, strong twine
• 2 feet, hemp cord or waxed linen
• Heavy duty scissors or floral cutters
• Hot glue gun and glue sticks • Preserved moss

INSTRUCTIONS:
Step 1:
Gather your materials and assemble on a large workspace.
Step 2:
Make a large bouquet with your filler and flowers, mixing and layering as you would a bouquet of flowers. Assemble it so that most of the florals will be visible from the front and sides.
Step 3:
Hold the bouquet at the bottom with one hand and trim excess stems with scissors or floral cutters, leaving the stems about 3 inches long.

Step 4:
With your bouquet on your workspace, carefully separate the stems to make an opening for the handle.
Step 5:
Place 4 inches of the stick (the broom handle) inside the stems of your bouquet.
Step 6:
Using your hemp cord or waxed linen, tie the bouquet tightly 3 inches up from the bottom of the stems, wrapping it around several times. This is your first tie, to keep the bouquet together while you tie it a second time with twine.
Step 7:
At this point you can carefully turn and adjust your handle so it will lay flat for hanging. Check to see if your bouquet is lined up on your handle as you would like it. If it lies nice and flat on your workspace, it will hang nicely on your wall.
Step 8:
Using your twine, tie a knot in the same place you tied the first knot with the cording. The knot should be in the back, with a tail hanging down 8 inches.
Step 9:
Start wrapping the twine tightly around the stems while holding the tail in place. Wrap as tightly as possible to keep your bouquet and handle in place.
Step 10:
Once you’ve wrapped the stems, leave about a half inch of stems unwrapped. Tie a tight knot with the remaining tail of the twine. At this point your broom is assembled, and you can start adding your magical accents.

Step 11:
To add a crystal, create a base for the crystal by hot-gluing a small amount
of preserved moss to the bouquet right below the handle. Hot-glue or tie your crystal to the broom.
Step 12:
Add more flowers or accents with hot glue.
Step 13:
Wrap twine at the top of the handle for hanging.
Step 14:
Decorate the handle as you like by wrapping ribbon around it and gluing on natural elements like dried fruits, flowers, crystals, etc. There are endless possibilities to make it your own magical creation!
Find more of Lemmon’s creations at etsy.com/shop/thewitchnthegoddess, or follow her on Instagram @thewitchandthegoddess.
