For our celestial cover shoot, we tapped Baltimore artist Nichole Leavy to create a full-scale paper moon for the shoot in photo editor Steve Parke’s studio. (Leavy created the painted backdrop for our winter 2017 cover, also shot by Parke, re-creating Dante Gabriel Rossetti’s Beata Beatrix.) “I was really excited when Steve told me about the idea,” Leavy says. “It fits with my aesthetic perfectly.” As an assemblage artist, she “uses a lot of vintage items, taking old and broken things and creating something new with them.” She researched dozens of examples of old-time paper moon photography to come up with a design that looked authentic but less grotesque than some of the original images could be. “I wanted it to be pretty,” she says. “I wanted to come up with a face that looked nice, that wasn’t overwhelming, but still had a lot of character. So it was a bit tricky.”
To complete the effect, she cut out stars from cardboard that Parke strung up in his studio and photographed later, in keeping with the “low-tech, handmade feel.” If you’re the handy type and want to try making your own paper moon, read and follow the tutorial below to see how Leavy made her (wooden) moon, step by step. Leavy’s been traveling to shows with the moon since completing the project, and it’s always a huge hit. “People love to sit in it and get their photos taken,” she says, though her moon’s popularity is hardly a surprise. Who doesn’t want to sit among the stars?

Paper Moon Tutorial Materials:
- Pencil, eraser, compass
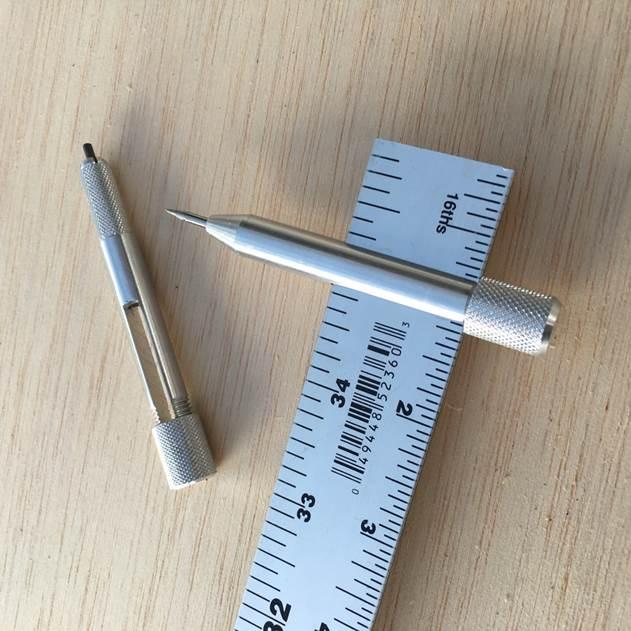
- Yardstick compass (or a nail and string)
- 1 sheet of 4’ x 8’ cabinet-grade plywood (3/4”)
- Latex primer
- Paint
- Small bench
- Table leg
- Bolts, washers, wingnuts
- Screws
- Drill
- Jigsaw
- sandpaper
- Before you start, take some time for internet research. Looking at examples of vintage paper moons will help you decide on scale, facial expression, and so forth.
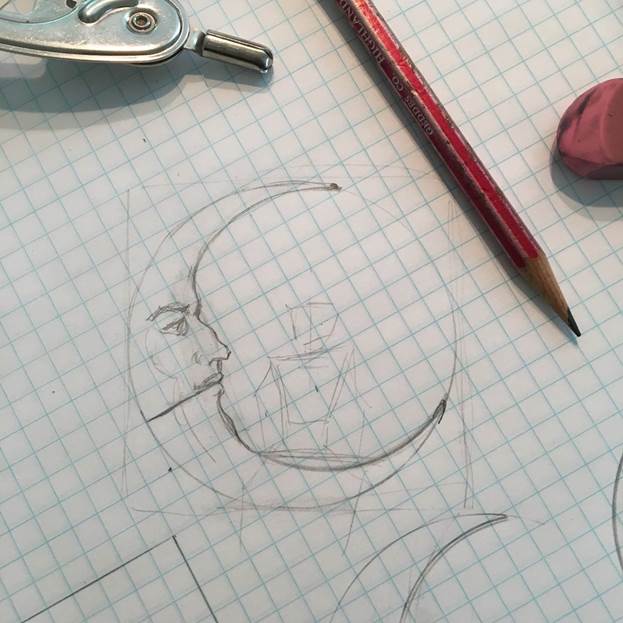
- Sketch your design on graph paper. It will make thing easier if you can keep the design within scale to fit within a 4 x 8 sheet of plywood. The one I’m making here needed to be slightly bigger, which made it necessary to patch on the points of the moon with scraps of plywood.
tip: Place your compass point on intersecting lines to draw your crescent shape—it will make it easier to transfer your drawing to the plywood
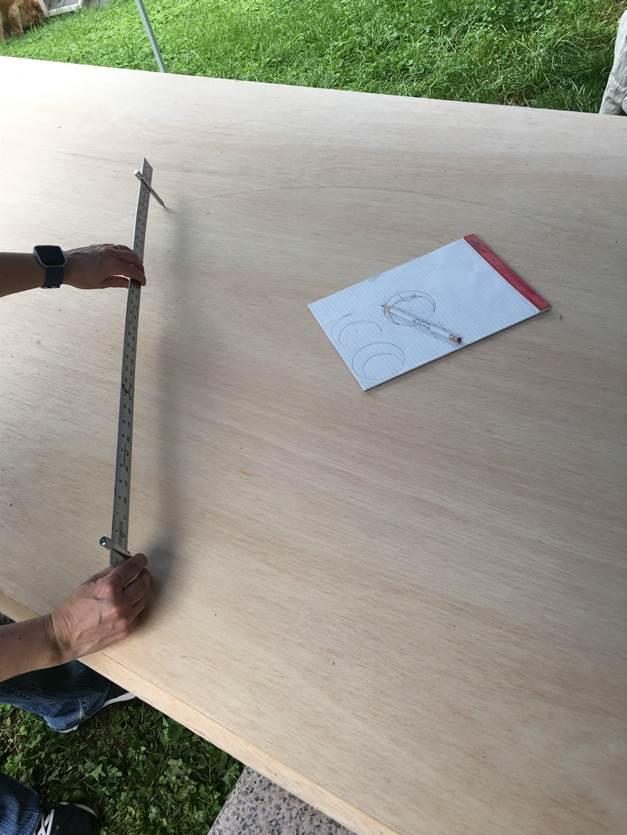
- Lightly draw a grid of 6-inch squares onto the plywood.
- Using a metal yardstick compass, (two metal pieces that slide onto a metal yardstick and tighten into position—one with a point, one with a pencil lead) and referring back to your drawing for correct placement, draw the crescent shape onto the plywood.

5. Use the grid on your sketch to help you transfer the drawing of the face.
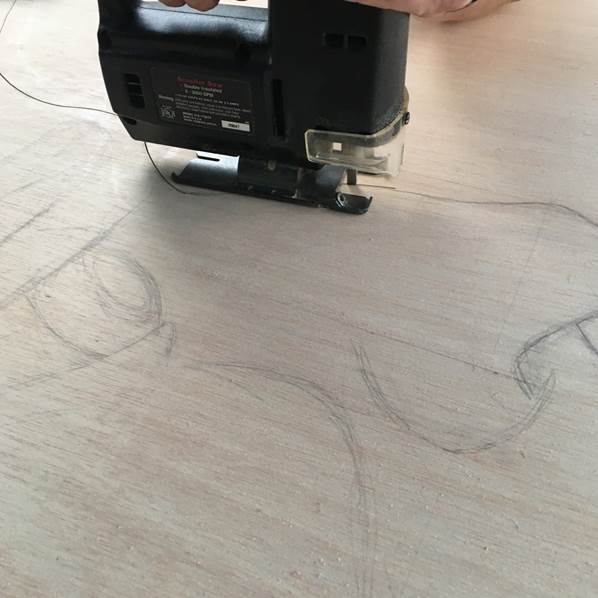 6. Cut out your moon using a jigsaw. Remember to wear eye and ear protection.
7. Sand all the edges well—you don’t want people getting splinters or snagged clothing.
8. Apply a layer of latex primer.
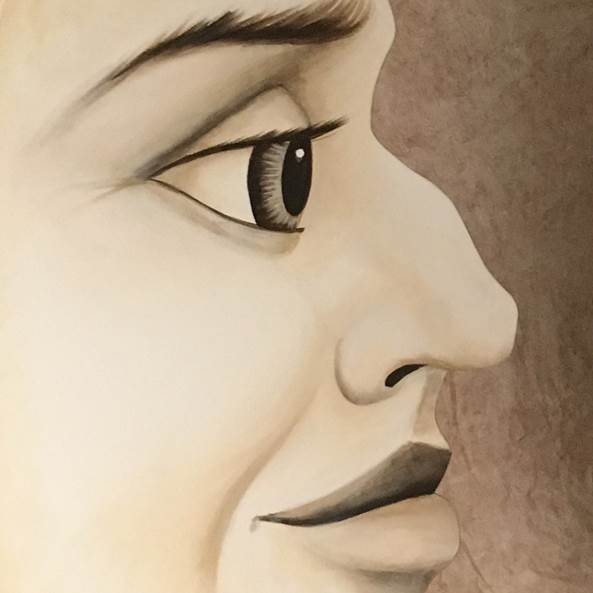
9. Paint the moon. I suggest keeping the pallet very simple. For my project, I used a very light yellow ochre for the basecoat, and a slightly darker yellow ochre for the medium tones, and raw umber for the darkest parts.
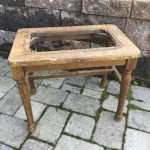
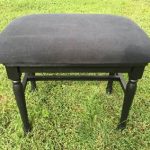
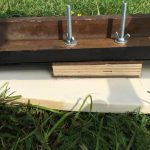
10. Next, you need a bench. In my case, I had a small vintage bench that I liked the shape and scale of. I painted it with flat black paint and recovered the cushion with black fabric.
*Consider building your own simple bench out of 2×4’s. By building your own heftier bench, you will probably avoid the instability problem that I encountered from the moon being heavier than the bench.
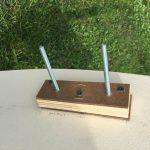
11. I used bolts to attach the bench to the moon, this way it can be disassembled for storage and ease of transport.
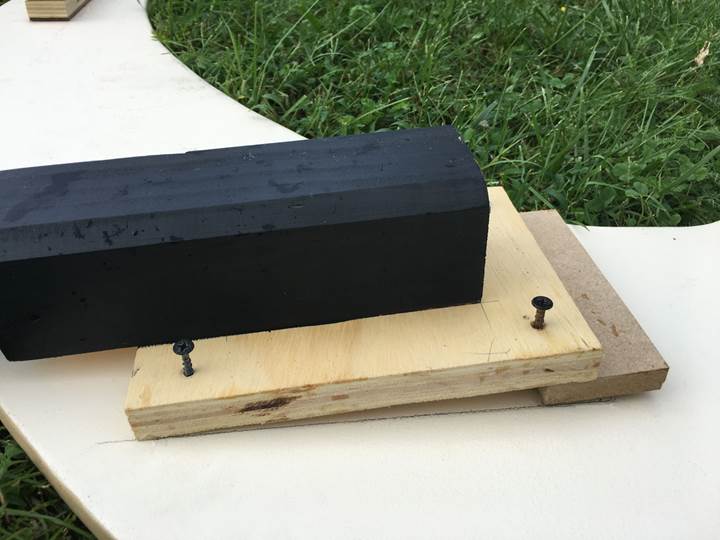
Find bolts that are long enough to go through a block (a filler required for the overhang my bench’s top) and the bench frame. Wing nuts, washers, and machine bolts work well. Drill through a mounting block and the bench the size of your bolts.
Then attach the block with the bolts to the rear of the moon with screws—being careful not to punch through the front.
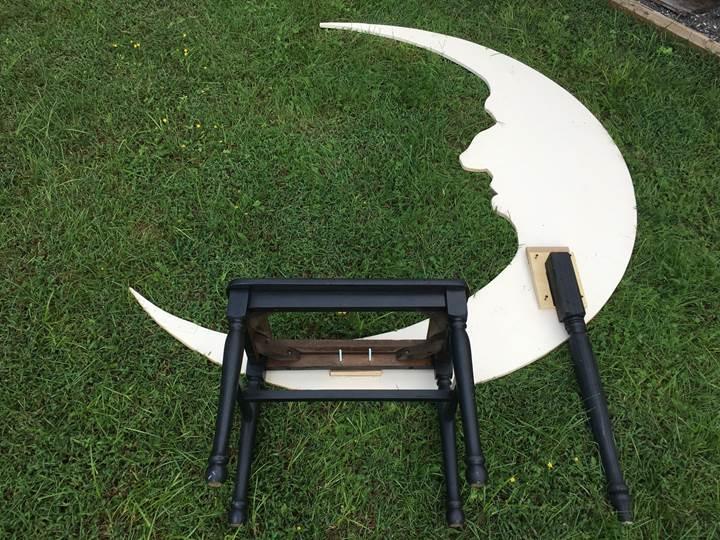
Since the bench weighs less than the moon, it tended to tip over, so I attached a table leg for added support
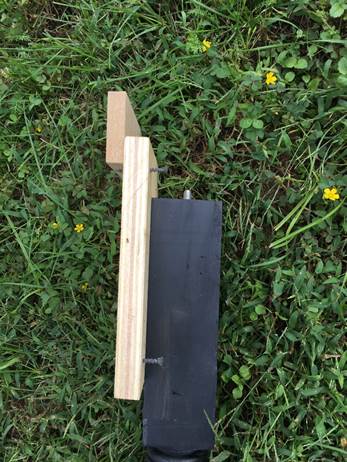
Scraps of wood ensure that the leg will sit at a slight angle, making the project feel secure. Again, be careful that your screws are not long enough to break through the front of the moon.