


Article taken from Issue #33 || Winter 2015
Print || Digital
Photos by Vince Chafin
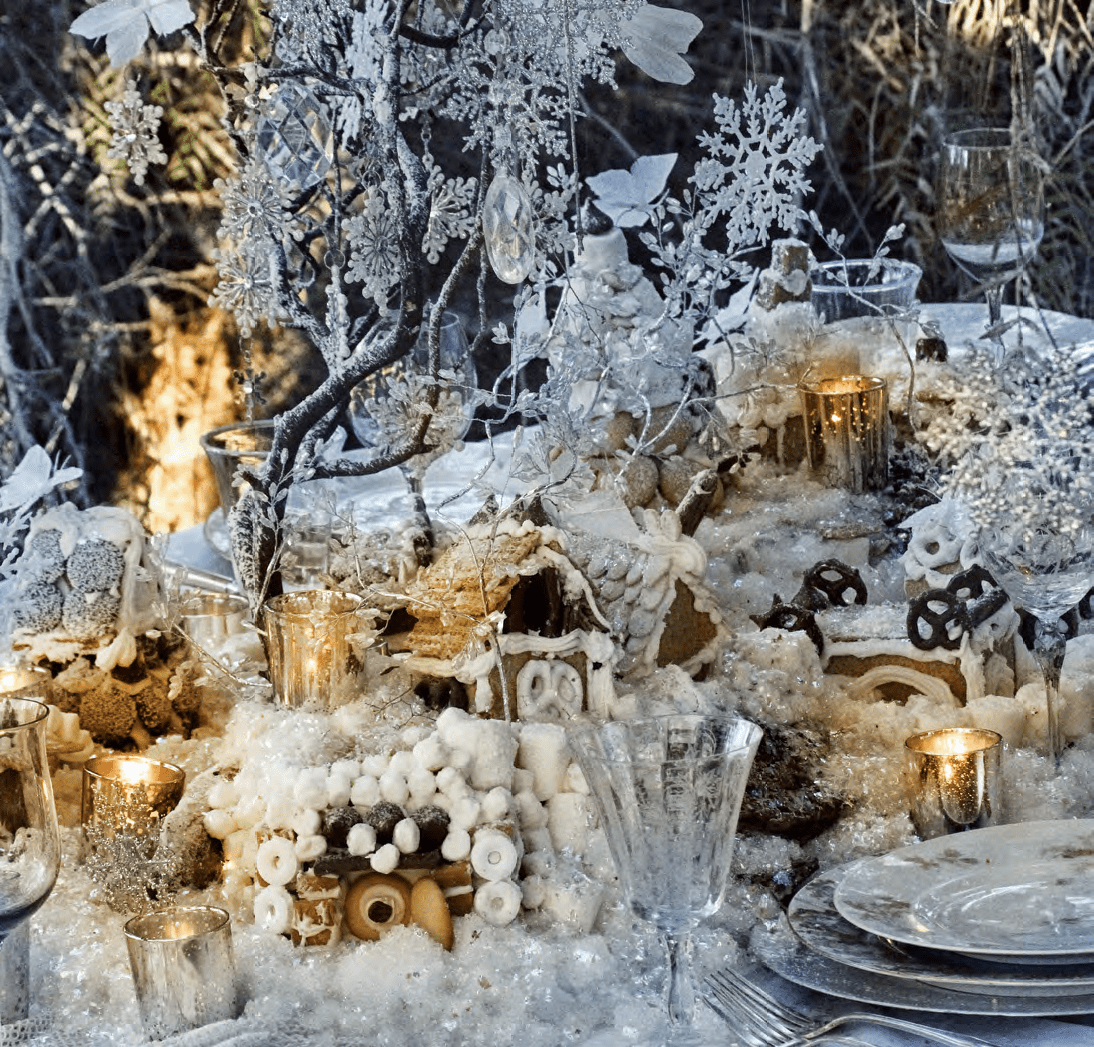
Here’s a fun project to satisfy your faerie’s sweet tooth, have a fun family day, and create a magical look for your winter table! What could be more enchanting than a faerie gingerbread village covered with snow for the little sprites that live in your home (the two legged kind as well as the wee ones with wings)?
I wanted to create something that was a bit easier to make than traditional gingerbread houses from scratch. Something that you actually can do with children and in a lot less time. So instead of baking gingerbread for the walls and roofs of our houses, I used ready-made crackers and cookies. To make it even easier I used small cardboard boxes and plastic storage containers as base structures and then “glued” graham crackers and cookies onto them with icing. This eliminated several complicated steps that might be beyond small fingers and adult patience levels.
I started by piping with a pastry bag (you can also use a spatula) icing onto a piece of cardboard or card stock paper then smooshing the box onto it. Using a spatula (you can also use a knife), I covered the box with icing and placed the cookies and crackers into the icing. The icing works like glue and dries within a few hours, making the structure solid. Once you get a little more adept you can build small houses without the base structure of a box. Just pipe a line of thick icing in a square shape onto your base cardboard and set a graham cracker on its edge into one of the lines, then pipe icing onto the side edge of the cracker and set another cracker at right angles to the first one. Continue doing this until you have a box shape. All connecting pieces (including cardboard) should have icing on them to glue them together.
Don’t worry about door or window openings—you can delineate them later with icing or candies. For the roof you can lean two crackers together to create an A frame shape. Make sure to use thick icing to glue them together. You can also make a flat roof and just lay a cracker on top. I had fun making all sorts of wild and imaginative shapes. Create shingled roofs by layering straight pretzels, almonds, flat licorice, or pumpkin seeds. Raisins, jellybeans, or gumdrops are fun to use for very fanciful roofs.
Marshmallows make great bricks and boulders. Woven textured crackers are great for roofs and walls, really creating a thatched look. I wanted to keep our look a bit more natural so I used a pallette of white and shades of brown. Chocolate creates a strong accent color. Of course it’s very important to sample all the candies as you use them to make sure they’re up to scratch, especially the chocolate! Rock candy is great for the gardens and walls, rope or string licorice for edging and decorative swirls. Life Savers, gummy candies, and clear mints transform into magical windows. The possibilities are truly endless!
To create our village I made the houses first and set them on a wide board. I then created hills and plateaus by using more cardboard boxes and setting them on the board. I used branches as trees and flocked them. If you wanted to keep everything edible you can use icing instead of flocking. You can use more icing to create snow down the village lanes. I played around with a fun product call Snow Real—a non-edible product that you mix with water to create a very realistic snow that lasts for weeks. You need to make sure it doesn’t touch the houses; the water in it will melt them. I used icing near the house and then the “snow” beyond that. I mixed in glitter and buried LED lights for extra sparkle. You can really get fancy by adding in jewels, pinecones, glitter, bits of wood, and moss. You’re truly only limited by your imagination.
If kept in a cool home your creation will last for weeks, giving you and your family a fun and imaginative table centerpiece!

Here is the recipe for the icing:
3 egg whites
4 3/4 cups of powdered sugar
1/2 tsp of cream of tartar
Slowly add the powdered sugar and cream of tartar to the egg whites as you beat with an electric mixer. Make sure the resulting mixture is stiff and not too runny as it will be holding your house pieces together.
I found that I could vary the amount of sugar a bit depending on what I was gluing together. Don’t make too large a batch all at once so it doesn’t dry out.
Keep in mind that you’re using raw eggs so I don’t recommend eating the icing if you can help it.
If using chocolate make sure the temperature in the house is on the cool side. It melts when you get into the high 80s.
The graham crackers will melt and crumble if next to any liquid or oozing candies.

A couple more tips …
If you plan this activity in advance you can order loads of beautiful candies online. Or right after Halloween the stores offer huge discounts on huge volumes of sweets!
Also, make sure to have real food around your crafting table for your kiddos and begin your crafting day on a full stomach. Otherwise the sugar highs can be pretty insane. Ask me how I know this!
I have checked your blog and i’ve found some duplicate content,
that’s why you don’t rank high in google’s search results, but there is a tool that
can help you to create 100% unique articles, search for: SSundee advices unlimited
content for your blog
some truly fantastic articles on this internet site, regards for contribution.