I’ve always been fascinated by witch balls, pagan crafts and their origins—especially the art of making wards, which are magical items intended to protect.
Researching the history of these tools allows me to feel a stronger connection to my magic practice. One cherished example is witch balls, a kind of ward that originated in England during the 1600s. They are used for protection against evil spells, hexes, negativity, sickness, and ill fortune. Plus, they’re gorgeous. They are definitely among my favorite things to make—and are sure to be yours too!
Legend has it that the beauty of mystical witch balls attracts negative spirits thought to be threatening a home’s tranquility. An orb’s swirling colors and uniqueness mesmerize the evil being. After a spirit touches a ball, its malevolent energy is trapped within the webbed strands of glass inside the orb, which prevent the spirit from affecting its surroundings.
Traditionally, witch balls are hung in an east-facing window. But really, any area around your home—whether in a window, on a desk, or even on a porch or elsewhere outside in a garden—is suitable for placing a witch ball to ward off (and possibly trap) negative energy.
Making witch balls is still a popular pagan craft and can take only minutes per ball. They make lovely ornaments for Yule as well as gift giving. Family and friends will love them as special handmade ornaments and will be captivated by the history and magical meaning. Maybe best of all, creating a ball will give you a greater connection to your witchly craft.
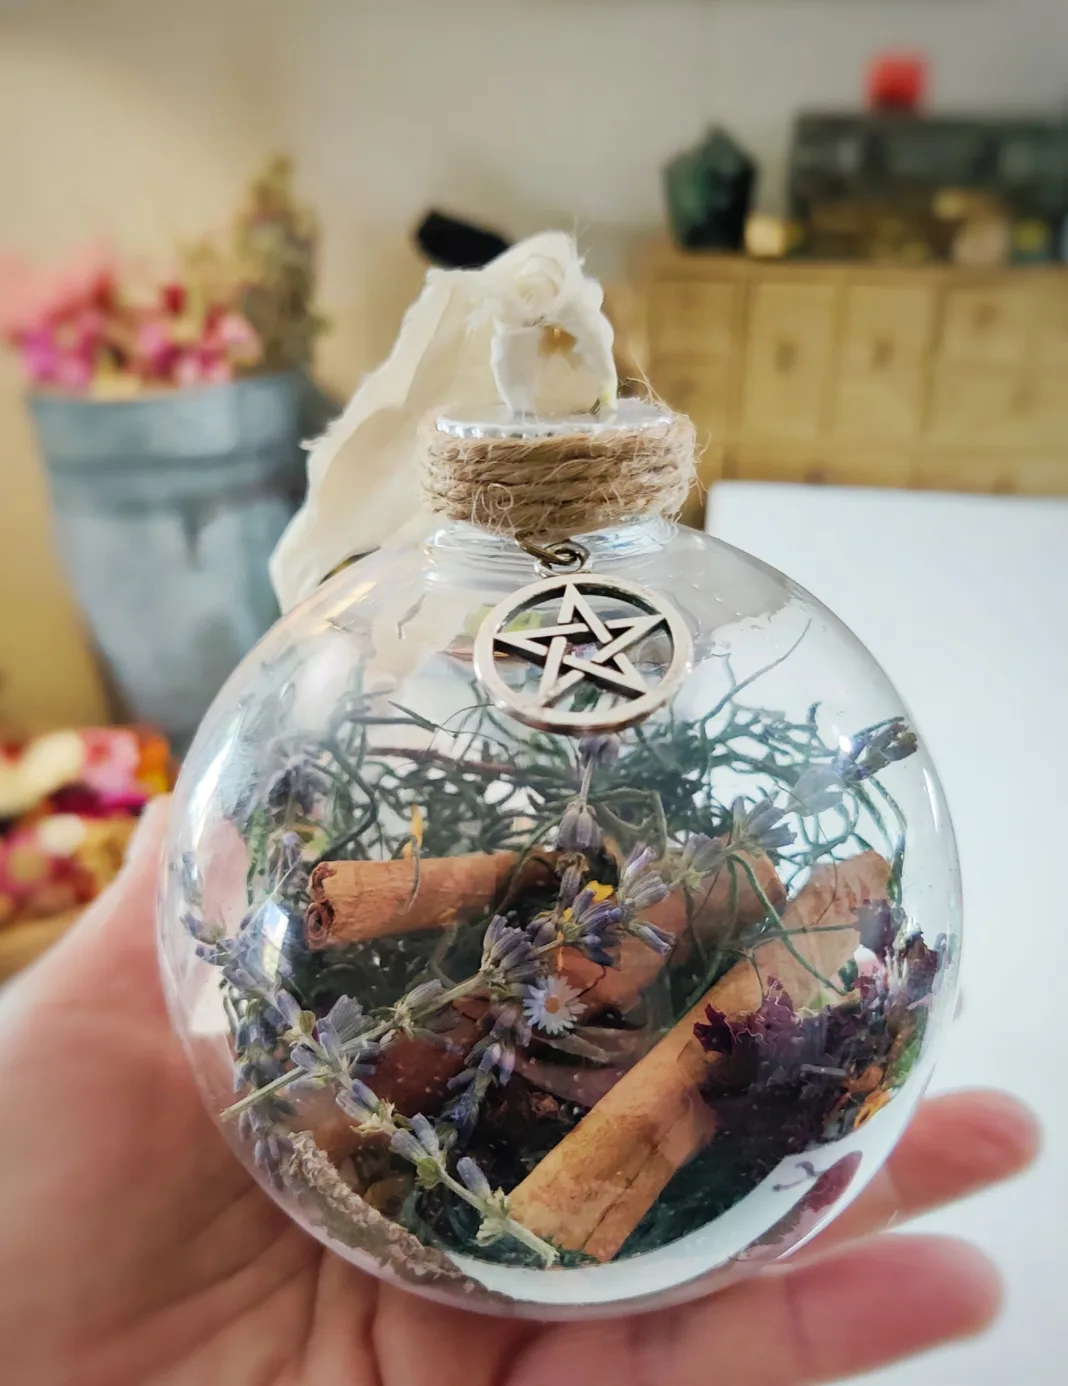
I like to begin mine with the clear glass ornaments carried in craft stores. These are especially easy to find around the winter holidays. I add flowers, herbs, spices, crystals, and charms that correspond with a specific intention, such as protection, happiness, good fortune, or peace. You can fill your witch ball as much as you want with your chosen ingredients. I like to fill mine halfway so I can see the individual items inside.
Once you have all your materials gathered, you’re only minutes away from completing your own mesmerizing witch ball.
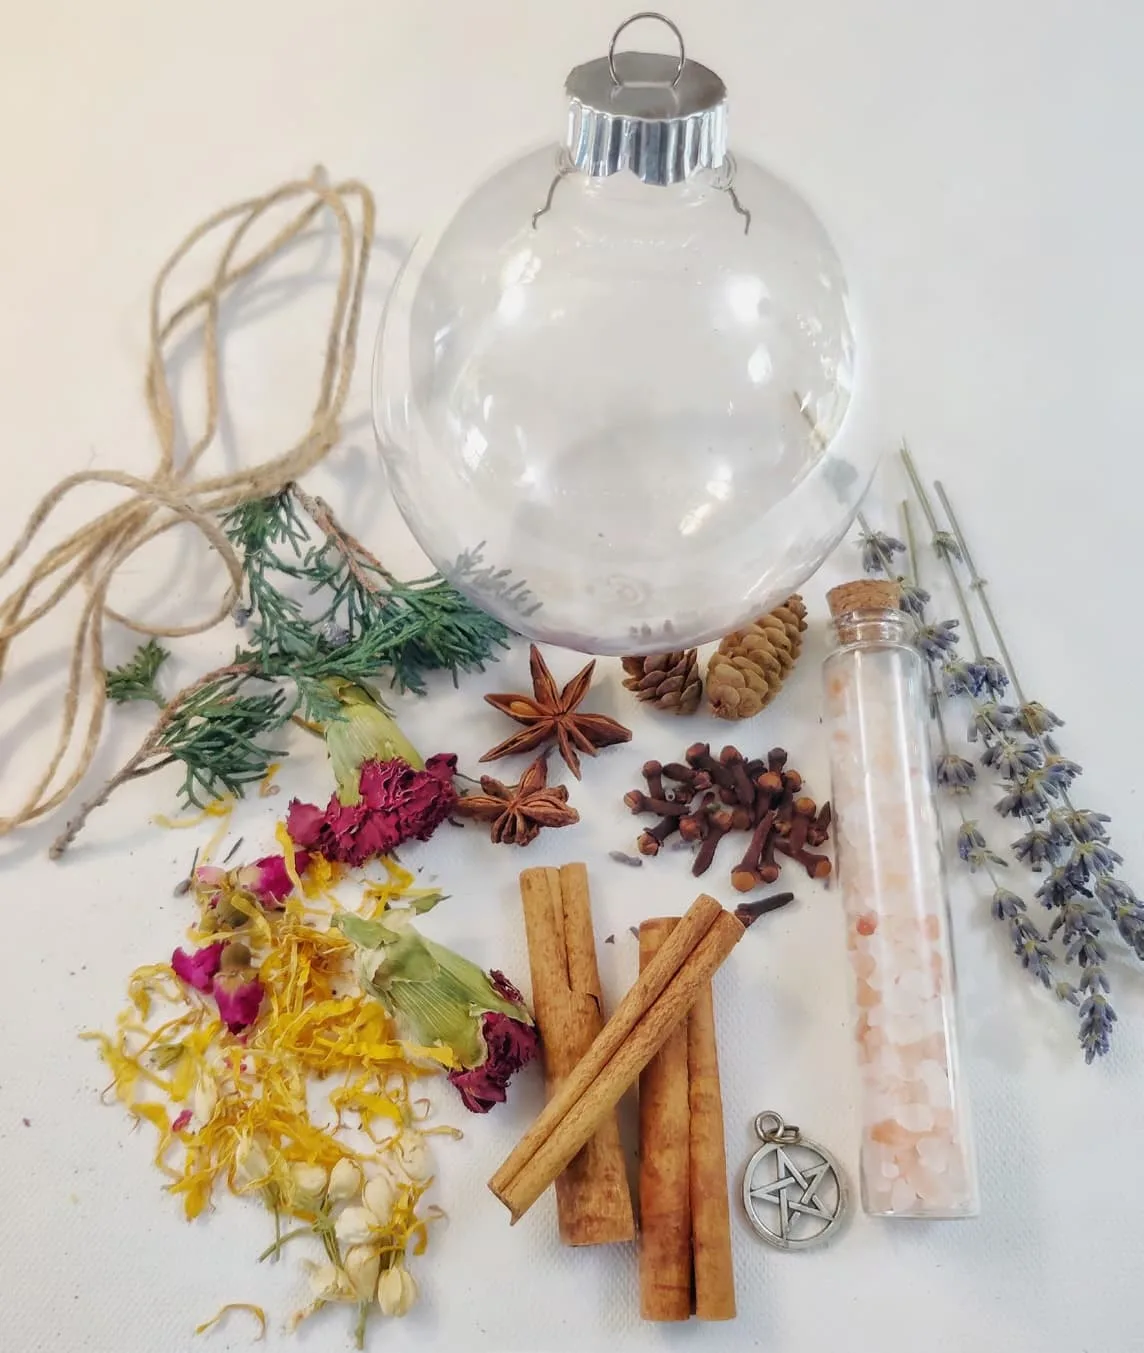
MATERIALS NEEDED:
Ingredients can vary depending on your specific intentions. It’s totally up
to you!
• 1 3-to-4-inch clear glass or shatterproof DIY ornament
• 1 or 2 4-inch cinnamon sticks
• 1 to 3 sprigs of lavender
• ⅛ ounce preserved moss
• Small dried flowers, ferns, pine cones, crystals
• 8 inches of natural twine
• 5 inches of cording
• Hot glue gun with glue stick
• 10 inches of ribbon
• 1 magic charm
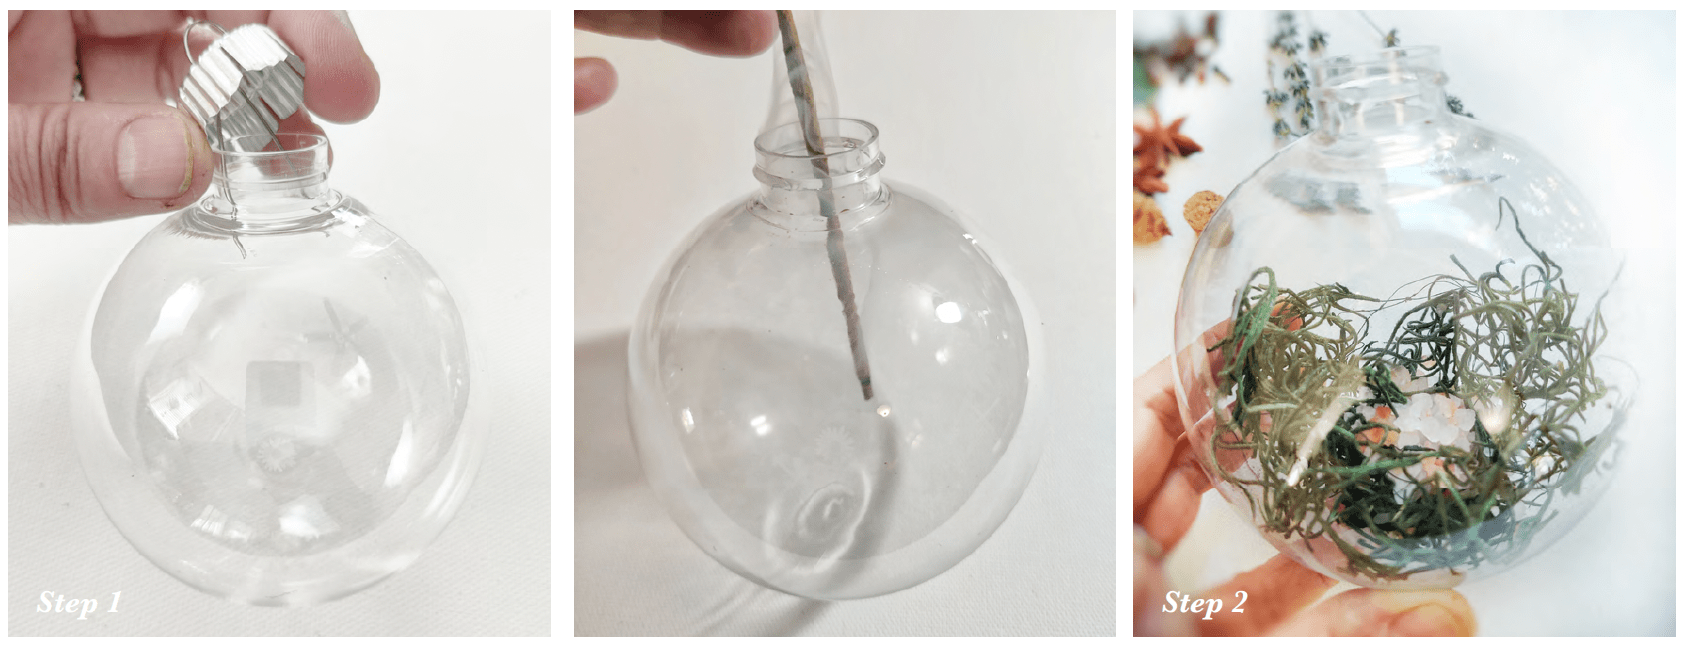
INSTRUCTIONS:
Step 1: Remove the hanger from the top of the ornament. Set aside. Before adding anything, I like to smoke-cleanse the inside of the ball with a stick of incense.
Step 2: Carefully, a few pinches at a time, add the preserved moss. Step 3: Put your other elements inside one by one.
Step 4: Add the hanger back on the top of your ornament by squeezing the two metal progs together and sliding them inside till the hanger snaps back into place.
Step 5: Add a tiny spot of hot glue to the base of the hanger and press the end piece of twine in place, gluing and wrapping the twine around the top. Cut excess twine.
Step 6: Tie on a magical charm and add ribbon to the hanger. Your enchanting witch ball is ready to hang in your home—or a friend’s!
Find more of Lemmon’s creations at etsy.com/shop/thewitchnthegoddess, or follow her on Instagram @thewitchandthegoddess.














 Enchanted Living is a quarterly print magazine that celebrates all things enchanted.